
In this episode
- Grey cement joints that cut through the wall instead of blending in
- A repoint in hydrated lime and white sand, with a perfect colour match
- Mock-ups of the new kitchen from a local kitchen designer
- Waste pipes for the sink, dishwasher and washing machine, with clips from the UK
- A six frame swarm trap with a lemongrass lure on the boundary wall
Why the grey mortar had to go
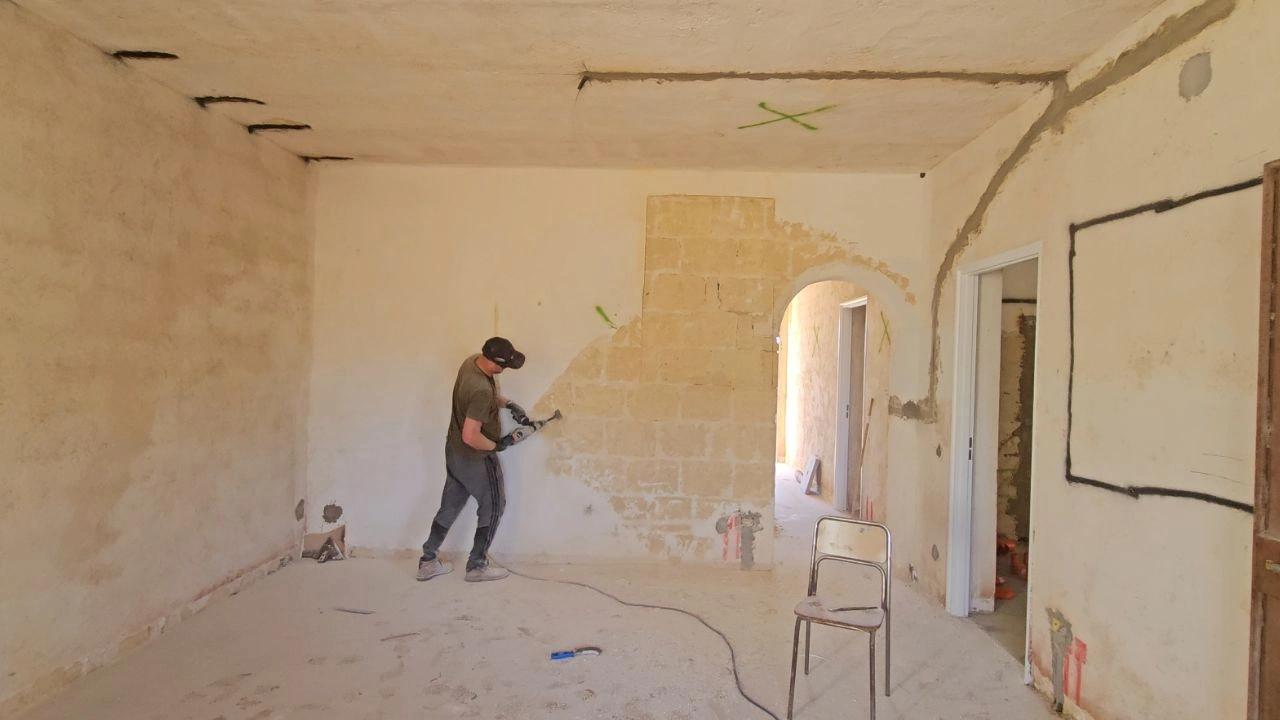
This week I repoint the stone feature wall with lime mortar. I really want to keep this wall exposed, but even after repointing the areas where the mortar had crumbled in episode 71, something still is not right. The problem is the mortar. Those grey lines are too harsh. They cut straight through the wall instead of blending into it. I was hoping that once it dried it would soften, but it has not.
So I do it again. This time I use hydrated lime and white sand, something that actually belongs here, because right now this wall is not being done justice. My article on what restoring old walls has taught me covers lime and stonework in more depth.
Repointing in lime
- Chisel the grey cement mortar back out of the joints with the electric chisel.
- Vacuum and brush off the dust.
- Spray the wall with water.
- Mix a new batch of mortar from hydrated lime and white sand.
- Press it into the joints, then brush the wall down and sweep the floor.
When the mortar dried, the colour match was perfect. Next I will seal the wall to lock in the finish, reduce the dust and deepen the colour of the stone, which happens in episode 90, after the shells are set into it in episode 89.
Watching the bees at work
I sit by the hive I set up in episode 73, with one of the cats on the bench beside me. Right now the bees are in full production mode, constantly coming out and going back in, all bringing pollen with them, yellow and orange in the pollen baskets on their legs. A worker bee only lives around five to six weeks in summer, and spends nearly its entire life working nonstop. The queen can live for three to five years, laying thousands of eggs and holding the entire colony together.
I fitted three bird boxes along the side of the house over winter, in episode 59. This past week I have noticed a big increase in activity, so I set up a trail camera to see who moves in, and it catches sparrows inspecting the boxes.
The new kitchen design
A missed electrical back box is cut out of the fresh plaster and cleaned with the multitool. Away from the camera, it has been a busy week. I met with a local kitchen designer at their showroom and designed the kitchen, and the designer has kindly put together a mock-up. I have had so many questions about the interior plans, so it is exciting to finally share where it is heading.
The design has changed so many times, but the aim has always been the same: something that works in real life, looks good and still feels like Sicily. I love traditional Sicilian kitchens, but they are not built for modern living, and I did not spend months chasing out walls just to hide appliances behind curtains. The design is pretty much complete, although I am still in two minds whether to stick with the lighter walnut finish or go for espresso. The design process and the costs will get a video of their own, and my real world cost breakdown covers the wider budget.
The kitchen waste pipes
With the layout fixed, I lay the waste pipe run for the sink, dishwasher and washing machine along the kitchen walls. The kitchen drain itself was upgraded to a larger pipe in episode 53. The orange pipe is dry fitted against the green laser line, cut and chamfered with the angle grinder, and clipped to the wall with screws into drilled holes. I have never seen pipe clips in any of the DIY shops in Sicily, so I had to bring these over from the UK.
Building a swarm trap
I decided to buy my first colony because I really wanted to get started, but what I would really love is to catch my own swarm. Last year I saw a swarm of bees hanging in the prickly pear bush, and I think that is where the idea of keeping bees really started for me.
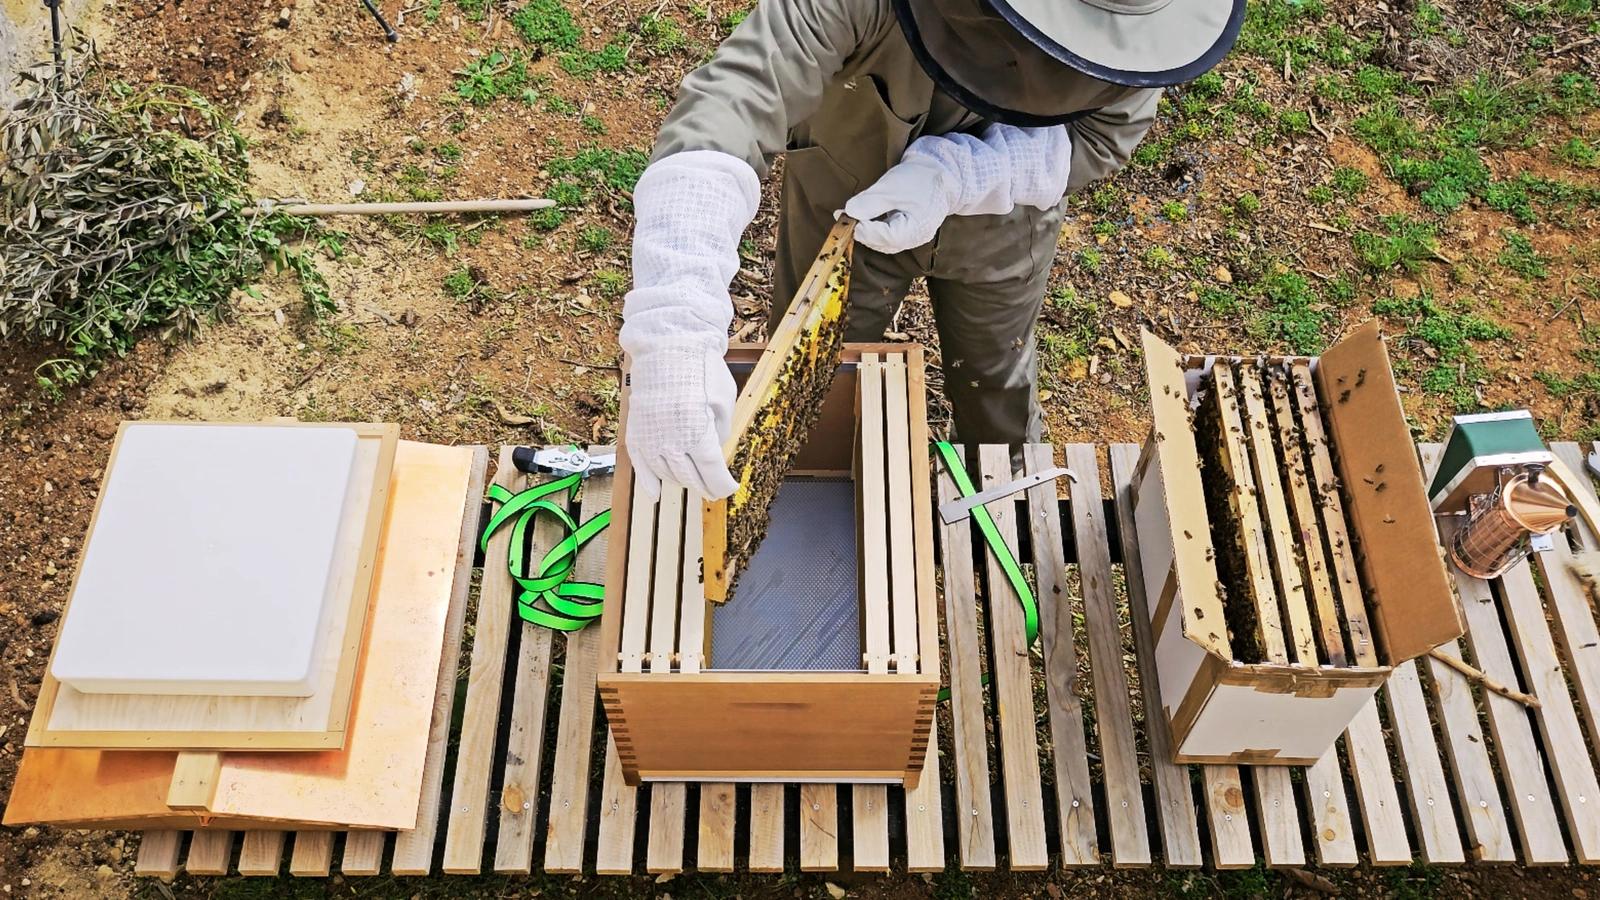
So I build a six frame swarm trap. I rig the generator battery to heat the stainless steel frame wires, melting the beeswax foundation onto them for a solid bond. The frames go into a plywood box, along with a lemongrass scented lure to attract passing swarms and encourage them to settle. The trap is screwed and strapped onto the boundary wall by the prickly pears, and the round entrance opened. My article on my first year of beekeeping covers swarms and much more.
The kitchen floor, the trees and the birds
In the kitchen, I score around the broken floor channel with the grinder, break up the old concrete with the SDS, shovel out the rubble and pour fresh concrete around the new waste pipes, levelling it flat, just as I did across the rest of the floor in episode 73. Outside, the almond, fig and olive trees are pruned with secateurs. Then the bird feeder is emptied, cleaned and refilled with crushed peanuts, sunflower seeds and pumpkin seeds from the supermarket, and the bird bath on top of its post is topped up. My practical guide to renovating in Sicily shows how these jobs fit together.
Frequently asked questions
Should you repoint a stone wall with lime or cement?
I first used grey cement mortar, but the lines were too harsh. I redid it with hydrated lime and white sand, and once dry the colour match was perfect.
How long do bees live?
A worker bee lives around five to six weeks in summer and works almost nonstop, while the queen can live three to five years.
How do you attach wax foundation to frames?
I rigged a generator battery to heat the stainless steel wires in each frame, which melted the beeswax foundation onto them for a solid bond.
What attracts a bee swarm to a trap?
I fitted my six frame swarm trap with a lemongrass scented lure, which helps attract passing swarms and encourage them to settle in.
More episodes on the same job: Stone walls and lime
 The weekly YouTube series